quadcopter (x-mode build log)
1. Introduction
This page will be a walktrough on the creation of my quadcopter. It will be a quick tour as most basiscs are explained in the 'multicopter basics' document as listed on the right. A list of the items I acquired for the project is in on the bottom of this document. Good luck building your own project if you decide to do so.
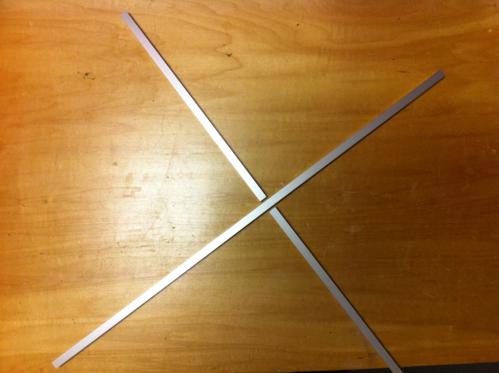
2. Drawing, construction materials
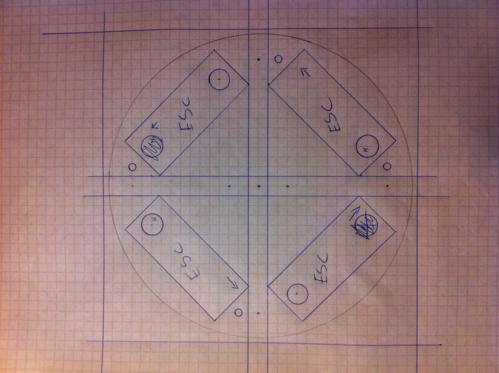
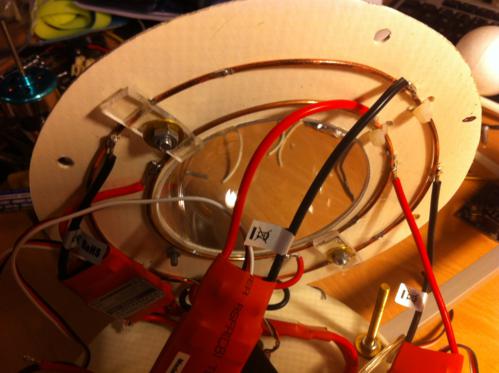
Lower level of the "Hamburger", with light switch, power plug, Spektrum satellite receiver and LiPo low battery warner. The white plate I used is 1,5 mm epoxy-glassfiber which I got from a Dutch store. It's very nice, altough a little bit heavy. You could use carbon instead.
3. Power and ESC's
After supplying your ESC's with power, you have to program each ESC to let it function properly for a Quadcopter. Connect the three wires to a brushless motor, connect the smaller three-wire flat cable with a programming card and supply the ESC with power. The motor will beep a couple of times to let you know the ESC has been programmed according to the settings you specified on the card. Read the card manual for more on this.
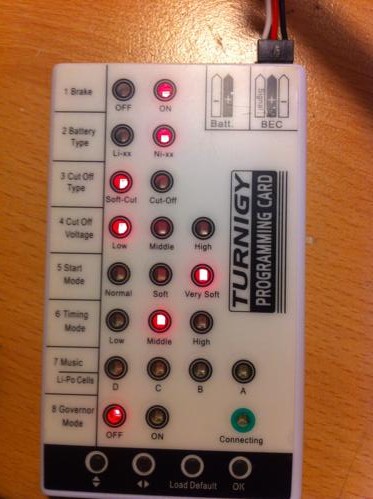
Typical programming card Quadcopter setup.
4. Control board and firmware
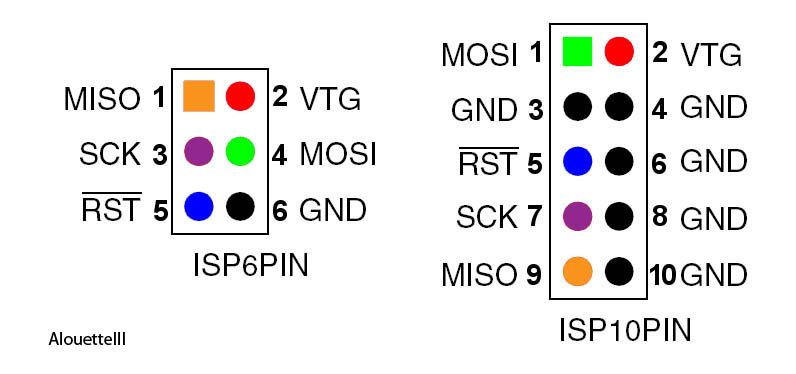
Before you make your control board unreachable by wiring etc, be sure it's programmed with the latest firmware. You can use an USBasp programmer fot his purpose. If you have one yourself and you're not sure how to connect it to the KK board, you can buy or make a converter cable yourself. It's quite simple. Use this schematic (top view) for this purpose:
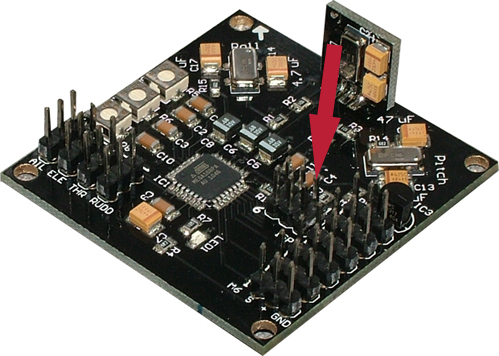
Pin 1 on the KK board is located here:
The Lazyzero KK multicopter flash tool is excellent for upgrading your control board to the firmware of your liking. This build log is based on KK X-copter 4.7 firmware.
When you get an error like 'error setting the fuses' attempting to upgrade the control board, be sure you selected the right controller board within the tool.
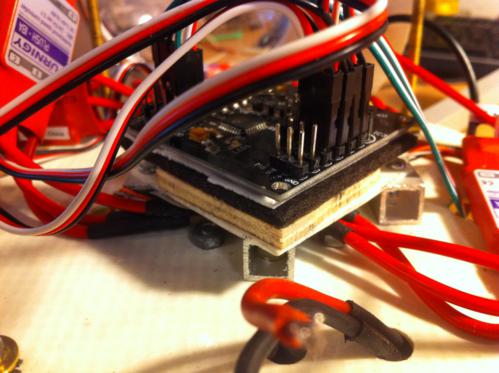
The control board should contract less vibrations from the motors as possible. To achieve this, you can use rubber or foam to dampen vibrations. This will ensure that the gyro's on the board won't get interfered.
5. Connecting the motors
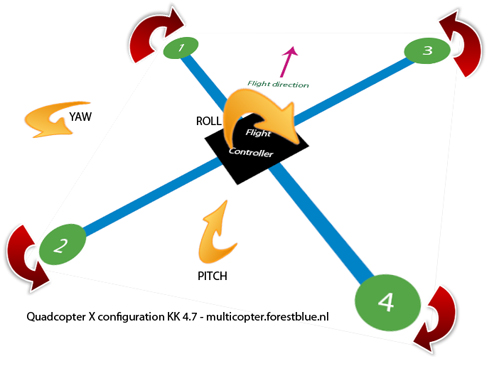
Based on the KK 4.7 firmware, connect your motors according to the picture beneath.
Motors 1 & 4 should spin CW, Motors 2&3 should spin CCW. You can test the direction in which they move after connecting your ESC to current, receiver (throttle port) and motor. Switch two wires from ESC to motor if it spins in the wrong direction.
6. Configure control board.
!! In all cases, don't perform steps in this part with propellers mounted!!
There's a lot to do about the 4.7 firmware from KaptainKuk. A lot of people can't get it to work. Including me when I started this project. I must say the board and firmware is badly documented. In the end, it wasn't that difficult as most things are. Before configuration be sure to wire your control board according to the manual you got with your KK board. Should be like something like this.
7. Introduction on the KK control board
note: For X-mode setup, use the motor setup as shown in the picture above.
The KK multicopter board has three potentio meters (POT's). For Roll, Yaw and Pitch. In earlier versions of the firmware, these were used to set the compensation interval for these three flight dimensions.
In the 4.7 KK firmware, the pots have a different usage. Don't be mislead by the roll/pitch/yaw markings on the board.
8. POT reverse
Normally, the three pots are on zero level when turned fully clockwise. Sometimes (don't ask me why) this setting is reversed and zero level is fully counter-clockwise. Anyway, you need to correct this. You can check whether the POT's are on the good setting by turning YAW and PITCH to 50% and ROLL to 0% (CW). When you connect the power to the board, the board's LED should flash three times. If not, disconnect and try again with ROLL on 100% (fully CCW).
If this is the case, you need to reverse the pots. This is how you do it:
- Disconnect power from board
- Power transmitter, throttle to zero
- Roll POT fully CCW
- Power board (LED flashes three times)
- Full throttle on the transmitter (board LED flashes constantly)
- Disconnect board from power
- Set ROLL POT to 50% again
- Power down transmitter
9. YAW reverse
For whatever reason, the gyro for YAW setting is reversed on the board. This will let your quad spin around and you don't want that. This will lead to this:
Follow these steps to reverse:
- Power transmitter, throttle to zero
- Roll POT at 0%, others at 50%
- Power board (LED flashes three times)
- More YAW stick (rudder) on your transmitter (board LED flashes constantly)
- Disconnect board from power
- Set ROLL POT to 50% again
- Power down transmitter
Note: Most of the times it's not needed to reverse other gyro's. If applicable, use the same procedure, except for moving the right stick for the desired gyro.
10. Throttle calibration
To be sure all motors spin at the same speed, it's needed to calibrate them. This is how you do this:
- Power transmitter, throttle to full
- YAW POT at 0%, others at 50%
- Power board (LED flashes two times)
- Set throttle to zero on transmitter
- Wait for the ESC's to beep for calibration confirmation (usually 2 times)
- Disconnect board from power
- Set Roll YAW POT to 50% again
- Power down transmitter
That's it.
11. POT settings for flying
These settings are default:
YAW = 50% -> Integral(I) and Proportion(P) for yaw.
PITCH = 0% -> I Parameter for Roll/Pitch.
ROLL = 50% -> P Parameter for Roll/Pitch.
More on I and P you can find here. I suggest you read it.
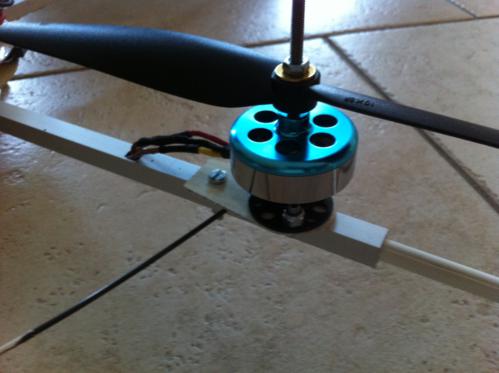
12. Propellers
This should be your final step before your test flight. There is a wide range of propellers available. Be sure you use two CW and two CCW propellers. It's very important to have properly balanced props. Read the reviews on the props of your liking before buying them. To balance the props perfectly, you can also use a prop balancer.
13 Transmitter setup
Bind first according to your transmitter manual. Again, WITHOUT PROPS!
For this project I use my Spektrum Dx6i. It's configured in Heli mode as this has more settings available. For instance, the throttle curve, which I will mention later.
These are the setting I changed from default for the quadcopter:
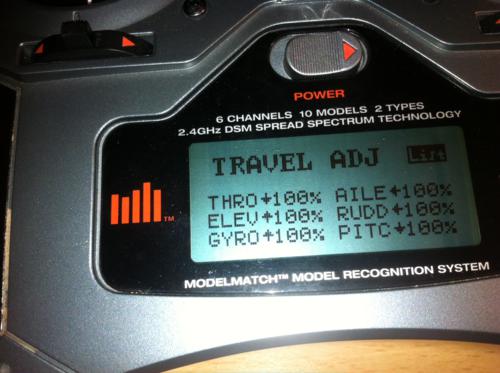
Set the throttle maximum position to 80%, so that the quad has space for compensation when on full throttle.
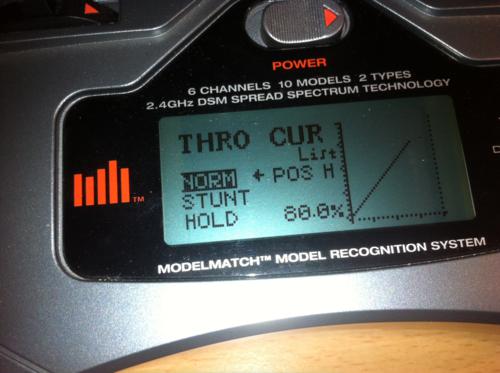
You can also set a very steep curve in the beginning and a more flat one on the moment of liftoff. This works great to make your quad hover more easily. The downside I experienced is that the liftoff point moves to a higher level when your LiPo gets drained.
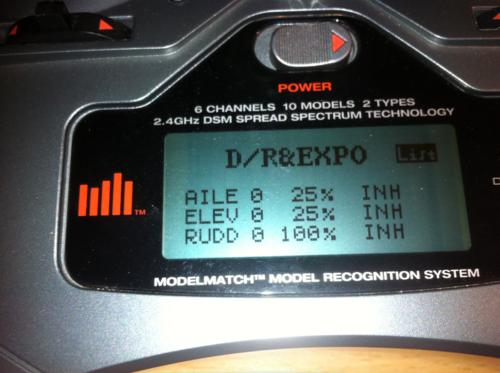
D/R expo is normally used to set the maximum range of servo motors. In the case of multicopters, you can use it to make your multicopter less itchy on the movement of your sticks. In other words, you will control it more smoothly. A very good video on Dual Rate and Expo can be found here.
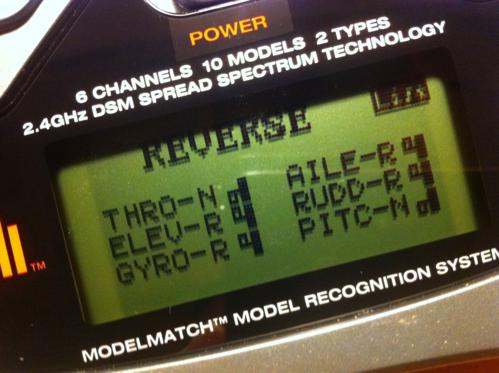
Reverse settings of the sticks. Needed for the KK board, else they will just react the other way around.
14. Quad fine tuning
Increase YAW POT in small steps until quad starts to oscillate at liftoff. Then decrease.
Increase PITCH POT in small steps until quad starts to oscillate after using pitch/roll during flight. Then decrease.
Increase ROLL POT in small steps until quad starts to oscillate during hovering. Then decrease.
These steps ensure the quad compensates at its best.
Note: Mosts quads have a slight deviation in the motors/propellers. This will move the quad to a specific direction during flight. Correct that with the trim option on your receiver.
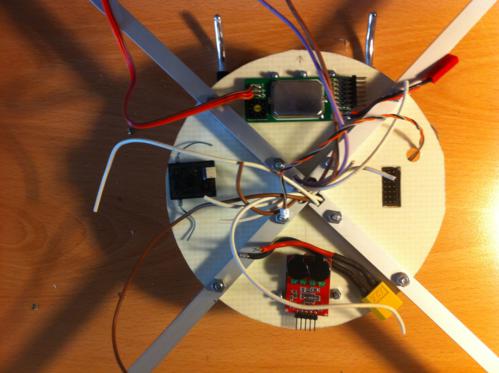
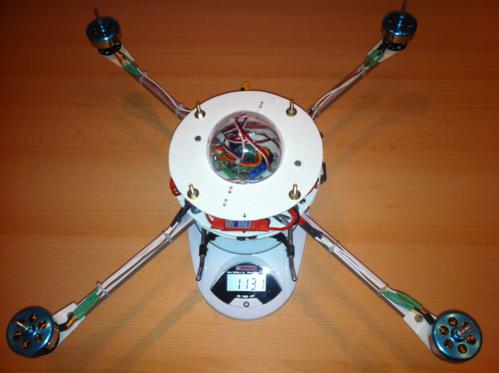
15. Some photo's of my project
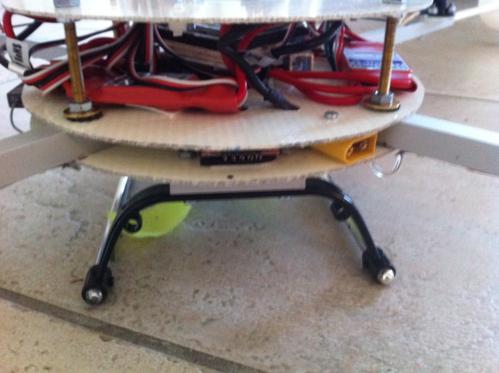
Three layered Quad (power connector and LiPo low battery warner on the first plate).
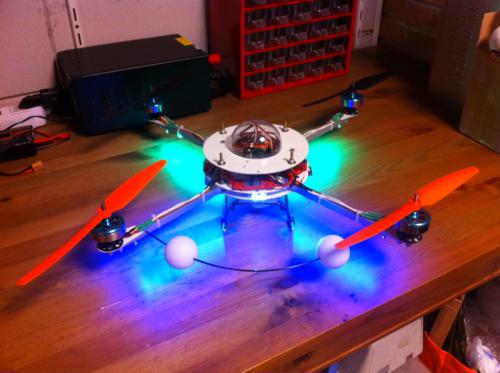
Flying! Sorry for the bad video quality btw.
16. Shopping list for this Quad-X
Hobbyking: Use these links to get a discount on the items yourself and help me maintain this site. ;-) Be sure you create a Hobbyking username first !
hexTronik DT750 Brushless Outrunner 750kv
HobbyKing Quadcopter Control Board V2.1 (Atm
Nylon XT60 Connectors Male/Female (5 pairs)
Turnigy 2200mAh 3S 40C Lipo Pack
Turnigy Accucel-6 50W 6A Balancer/Charger w/
TURNIGY Basic 18A v3.1 Speed Controller
10X6 Propellers (Standard and Counter Rotating)
Turnigy High Density R/C LED Flexible Strip (Green)
Servo Terminals (JR) Gold Plated (10pairs/se
Multi-Remote Receiver operated on/off Switch
Signal loss Alarm & Lost Plane Finder
usbasp AVR PROGRAMMING DEVICE FOR ATMEL PROCCESSORS
TURNIGY R/C UNIVERSAL MAIN BLADE balancer(CARBON FIBER)
Other things :
Epoxy-glassfiber plate 1,5mm (Dutch store)
Styropor ball (Dutch store)
Transparant ball half (Dutch store)
Overview
- Multicopter basics
- KK Quadcopter build log
- CopterControl Quadcopter build log
- LiPo need calculator
- Disclaimer